Free Crochet Pattern

Ooooo from Disney Pixar's "Elio"

Meet Ooooo, the most adorable and curious little secret super star in Disney Pixar's new adventure "Elio"! With a name as playful as her personality, Ooooo is a tiny cosmic explorer, a liquid super computer with a big heart and an even bigger sense of wonder. Always ready to turn the (Comm)universe upside down (in the best way), Elio's charming little sidekick proves that sometimes, the smallest stars shine the brightest – and even make your crochet wishes come true along the way!

Customizing Ooooo

You can crochet Ooooo in a variety of sizes: from tiny pocket-sized versions perfect for slipping into your bag or keychain, to adorable amigurumi size, all the way up to the Oooooriginal size for those who love extra cuddly and huggable friends. The pattern is the same for all sizes - the difference comes down to the materials you choose.

For Ooooo with a beautiful blue gradient, you’ll start by crocheting the body entirely in white cotton. Then, you add the blue gradient using soft pastel chalk and a paint brush (just a heads-up: this technique works best on cotton yarn! Synthetic fibers won’t take the color well.).

If you don’t have pastel chalk on hand, no worries - you can also use eye shadow or blue colored pencils instead of soft pastels, or crochet Ooooo completely in light blue yarn.

To give Ooooo a stellar, intergalactic twist at night, I embroidered her circuits with white glow-in-the-dark yarn. Want to mix it up? Silver Lamé yarn adds a touch of shimmer, or you can go for plain white cotton for a clean, classic look.

Material List

Small . 5 cm / 2 inch

Crochet Hook: 2.25 mm (US: B/1, UK: 13), or 2.5 mm (US: -, UK: 12)

Cotton Yarn size 2 fine (sport / baby weight)
50g / 125m (2oz / 137yd),
10x10cm (4x4 inch) = 26 sts x 36 rows

White
Scheepjes Catona / 105 Bridal White

Glow-in-the-dark Yarn
e.g. Scheepjes Glow Up, or Ricorumi Glow, or DMC light effect E390

TIP: To get a glowing thread thin enough for embroidering Ooooo’s circuits, untwist a piece of glow-in-the-dark yarn and use two strands held together.

1 pair of round black safety eyes Ø 6 mm / 2.4 inch
Blue soft pastel chalk and a paint brush
Strong black sewing thread for adding a smile
A small piece of pink yarn (size 2) for cheeks

Medium . 10 cm / 4 inch

Crochet Hook
3.5 mm (US: E/4, UK: 9)

Cotton Yarn size 3 light (worsted weight)
50 g / 85 m (1.76 oz / 93 yd)
10x10cm (4x4 inch) = 19 sts x 23 rows

White
Yarn and Colors Epic / 102 Marble,
or Scheepjes Cahlista / 105 Bridal White

Glow-in-the-dark Yarn
e.g. Scheepjes Glow Up, or Ricorumi Glow, or DMC light effect E390

1 pair of round black safety eyes Ø 10 mm / 4 inch
Blue soft pastel chalk and a paint brush
Small pieces of black and pink yarn (size 2) for embroidering a smile and cheeks

Large . 20 cm / 8 inch

Crochet Hook: 6.0 mm (US: J/10, UK: 4)

Chenille Yarn size 5 bulky (chunky)
Sky Blue Chunky Chenille of any brand

Glow-in-the-dark Yarn
e.g. Scheepjes Glow Up, or Ricorumi Glow, or DMC light effect E390

1 pair of round black safety eyes Ø 20 mm / 8 inch
Small pieces of black and pink yarn (size 3) for embroidering a smile and cheeks

Question title

Write a complete answer to the most frequent questions that your customers might have, such as important product information, shipping policies, payment issues or returns.

Tools

No matter which size you choose for making Ooooo, the following tools and materials are essential for every version:

  • scissors
  • a yarn needle
  • pins
  • stitch markers
  • soft amigurumi stuffing (e.g., Polyfiber Fill).
Copyright

Oooo's crochet pattern is an official Cooperation of Lalylala Amigurumi and Disney PIXAR Germany.

© 2025 Lalylala Amigurumi . Lydia Tresselt . All rights reserved. No part of this pattern may be published, resold, reproduced (in any form or by any means, electronic or mechanical, by photocopying, recording or otherwise), shared, translated or altered without prior permission in writing from the author.

Selling of finished Items

The crochet pattern is copyright and must not be reproduced for resale! You cannot sell finished Items made from this pattern. For your personal use (non-profit) or for charity purposes you are permitted to make as many items from this pattern as you like.

Abbreviations (US terms)

ch = chain stitch
dec = decrease (crochet together 2 sts with 1 sc)
inc = increase (2 sc into the same stitch)
rnd(s) = round(s)
sc = single crochet stitch, x-shape
sc3tog = single crochet together 3 sts at once (similar to invisible dec)
slst = slip stitch
st(s) = stitch(es)
°…° = work instructions between °...+...° all into the same stitch or same spot
[…] ...x = repeat instructions written in brackets as a sequence as often as given after the closing bracket, example: [sc 1, inc] 5x
(…) = total number of sts at the end of a row or rnd

Ooooo’s Body

Start with a foundation chain of 8 ch using white (or blue).

01. along the chain starting in the 2nd st from hook: sc 6, °sc 3° into the last st, along the other side of the chain: sc 5, inc (16)

Adjust beginning of following rnds: slst 1 into the first st of the rnd (→ photo 01). Place a stitch marker into very next stitch (this marks the new beginning of the upcoming rnds):

02. [sc 5, °sc 3°, sc 1, °sc 3°] 2x (→ photo 02) (24)

03. [sc 6, °sc 3°, sc 3, °sc 3°, sc 1] 2x (→ photo 03) (32)

04.[sc 7, °sc 3°, sc 5, °sc 3°, sc 2] 2x (→ photo 04) (40)

05.-09. (5 rnds) sc 40

10. [sc 11, inc, sc 3, inc, sc 4] 2x (44)

11. sc 44

12. [sc 12, inc, sc 3, inc, sc 5] 2x (48)

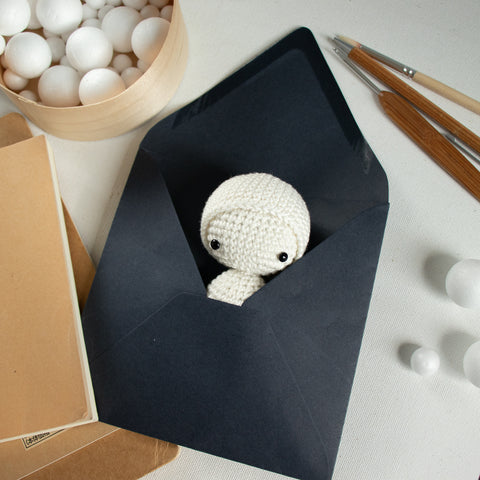
Attach Ooooo’s eyes between rnds 10 and 11 with a distance of 9 sts being visible between the eyes (→ photos 05+06).

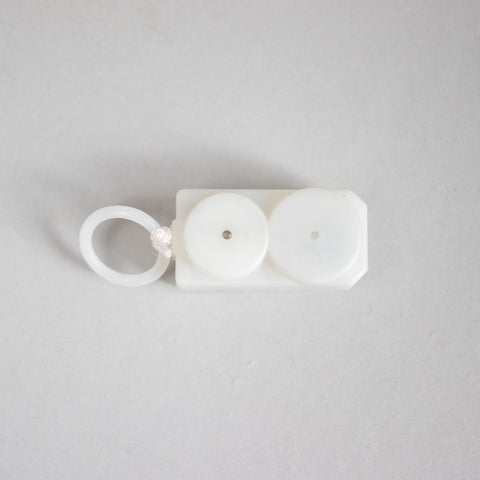
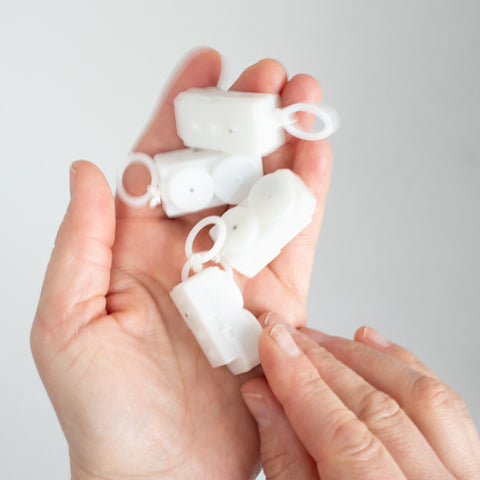
TIP: Stuffing the head evenly can be challenging due to the long shanks of the eyes inside. As a result, the eyes often end up looking crooked. To prevent this, seal the eyes (→ Tutorial B).

13.-15. (3 rnds) sc 48

Adjust beginning of following rnds: sc 2, replace stitch marker into the very next stitch (this marks the new beginning of the upcoming rnds):

16. [sc 8, sc3tog, sc 7, sc3tog, sc 3] 2x (40)

17. [sc 7, sc3tog, sc 5, sc3tog, sc 2] 2x (32)

18. [sc 6, sc3tog, sc 3, sc3tog, sc 1] 2x (24)

19. [sc 5, sc3tog, sc 1, sc3tog] 2x (16)

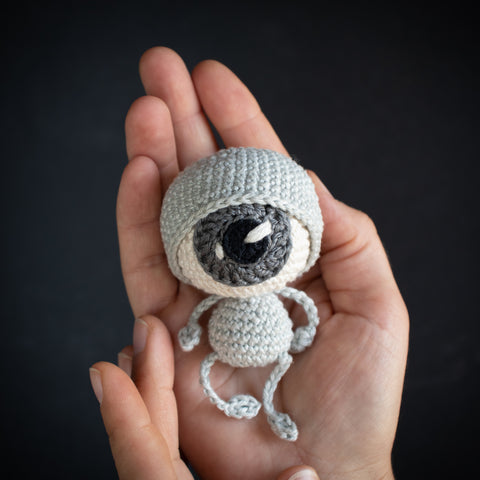
Cut the yarn with a long tail and pull the end through the last stitch completely (→ photo 07).

Stuff Ooooo’s body firmly.

Thread a needle with the yarn end and sew together the opposite sts at the open end of Ooooo’s body in order to close the open end of the body (→ photos 08+09). Weave in the end.

Legs (make 2)

Make a magic loop from white (or blue).

01. sc 6 into a the magic loop (6)

02.-03. (2 rnds) sc 6

Slst 1, cut the yarn with a long tail and pull the yarn end through the last st completely (→ photo 10). Make another leg the same way.

Stuff the legs a little bit and use the long yarn tails to sew the legs onto the bottom of the body (→ photos 11+12).

Blue Gradient

Use sky blue soft pastel chalk and a paintbrush (or color pencils, or eye shadow) to add the blue gradient to Ooooo’s body.

Pick up the color with the brush and gently rub the chalk dust into the fibers using circular motions (→ photo 13). Repeating the application at a spot will intensify the color. Fade out the blue to white on her face, back, and on both sides of her legs (→ photo 14).

Once you’re satisfied with the coloring, gently wipe Ooooo’s body with a dry cloth to remove any excess chalk dust.

Mouth

Embroider a little smile at the same height as OOOO’s eyes (→ photos 15-17). You can also just add a horizontal black, or dark blue line if you want her face expression to be rather neutral.

Cheeks

A lovely little pink blush next to Ooooo’s eyes makes her looking extra cute.

Circuits

Use glow-in-the-dark yarn (or silver lamé, or white yarn) to embroider lines, corners, and crossings around Ooooo’s face. There’s no need to follow a specific stitch pattern - just let your creativity flow! (→ photo 18)

Embroider French Knots at the ends of some lines. No worries, if you don’t succeed in making a French Knot on your first try - it may take some practice to get it right. In the meantime, you can simply tie a big knot in a piece of yarn and sew it in place. It only takes a few extra minutes, but it works very well too.

Pattern Download (PDF)

This cosmic collaboration with Disney is officially sending me out of this world, and I’m thrilled to share it with you — for FREE!