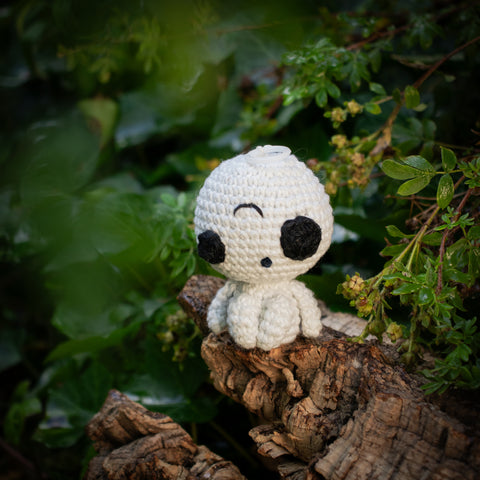
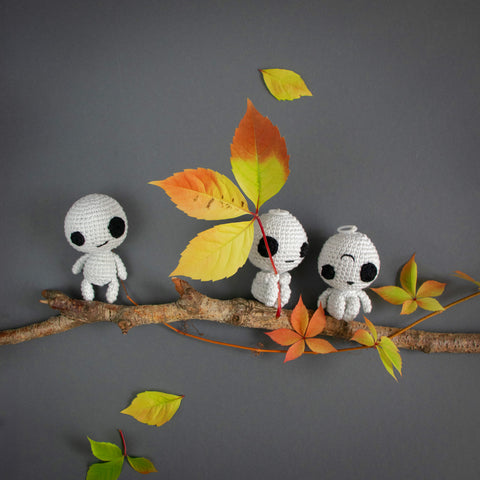
Hey there, fellow anime lovers! Have you ever wished to bring a piece of kawaii kami magic into your home? Great! So let’s take a stroll through the enchanted woods of Lalylaland searching for the cutest, kindest and most whimsical tree spirits that you can imagine – Kodamas!
But be prepared! Kodamas only show up to those with a kind and honest heart! Being pure of heart, it won't be hard to find these charming creatures. Made of glow-in-the-dark yarn they will light up the night like tiny neon green moonbeams.
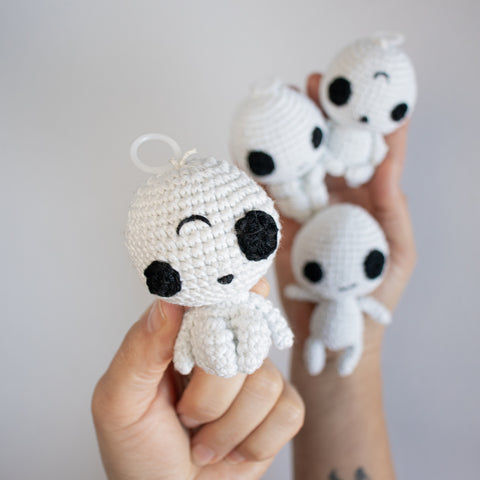
Once a Kodama shows up, we will reveil another secret! Hidden inside the tiny spirit's body lies a secret vibrating mechanism that will have the little guy shaking with joy at every pull on the string. It’s like having a mini party in your hands!
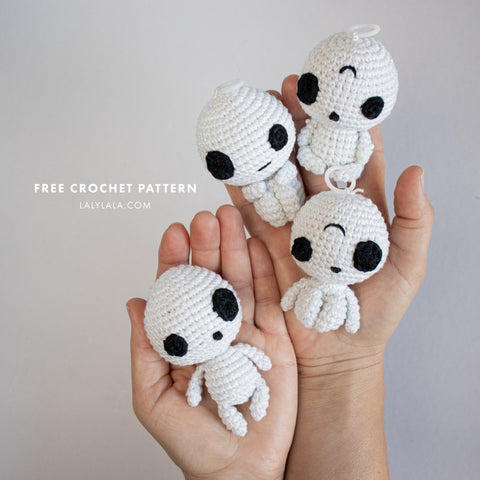
These quirky amigurumi forest spirits are my humble tribute to Studio Ghibli’s masterpiece Princess Mononoke, which is one of my all time favorite animes. If you haven't seen it yet - go watch it! This said, I'm happy to share my love for the movie and this little free Kodama crochet pattern with you!
And now, channel your inner forest spirit, and let’s create a glowing companion! And who knows? We might just summon a few real-life Kodama along our way! 🌿✨
What is a Kodama?
Some might know those chubby fun little guys from Studio Ghibli's Anime masterpiece Pincess Mononoke, but Kodamas (木霊, 木魂 or 木魅) have a much longer tradition in Japanese folklore.
Kodamas inhabit trees and even if they are quite friendly, kind and playful, they get angry if someone tries to cut their tree. Cutting down a tree which is home to a kodama will bring misfortune and you might probably get cursed too. To protect you from such a mishap such trees are often marked with shimenawa rope – a boundary marker for the residences of spirits and gods.
Shopping List
Of course you can make Kodama's from every yarn of your choice. You can add a rattle box, you can skip the noise maker inside.
Most fun is your Kodama made from Glow in the Dark Yarn with a shaking toy insert making them both, vibrating, rattling and mysteriously glowing green at night!
ch = chain stitch dec = decrease (single crochet 2 sts together) hdc = half double crochet inc = increase (2 sc into the same stitch) rnd(s) = round(s) sc = single crochet stitch slst = slip stitch st(s) = stitch(es) °…° = instructions between ° and ° being worked all into the same stitch or spot […] …x = repeat instructions written in brackets as a sequence as often as given after the closing bracket, (example: [sc 1, inc] 3x = sc 1 into the first stitch, increase into the next stitch, repeat working 1 sc and 1 inc into the next stitch 3 times total) (…) = total number of sts at the end of a rnd
The crochet design and pattern are copyright and must not be reproduced for resale! You cannot sell finished toys made from this pattern. For your personal use (non-profit) or for charity purposes you are permitted to make as many items from this pattern as you like.
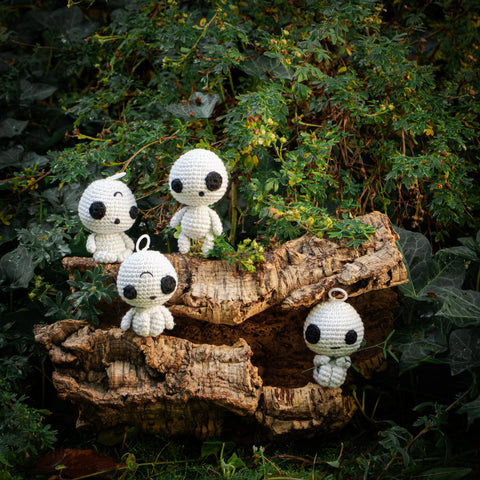
Same same but different
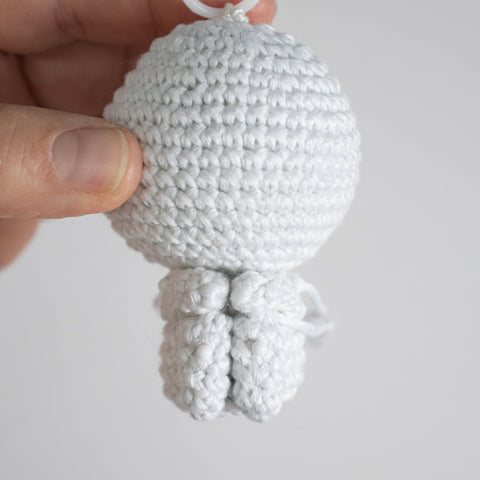
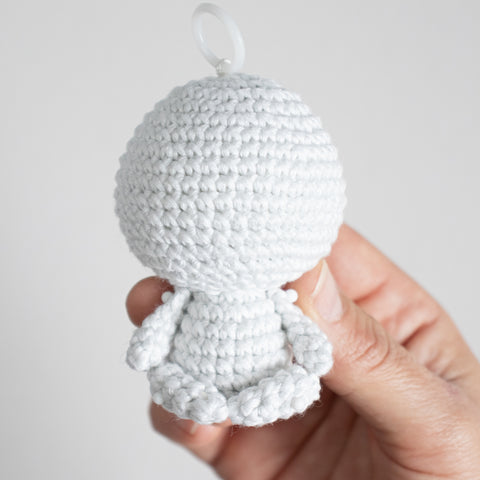
For all Kodama versions you'll be using (almost) identical body parts. Once head, body and limbs are ready to be joined, it's up to you to make a decision about which Kodama you want to create by choosing different placements for the limps to be attached.
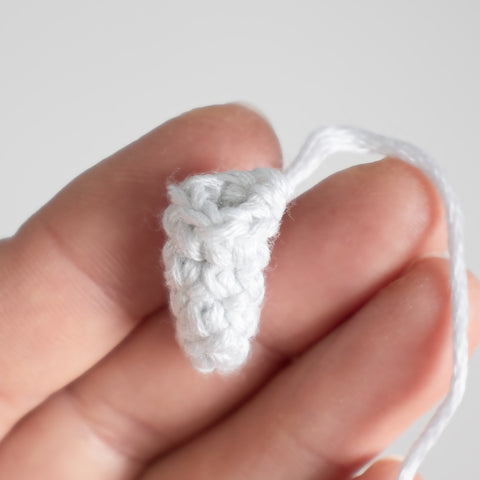
Head
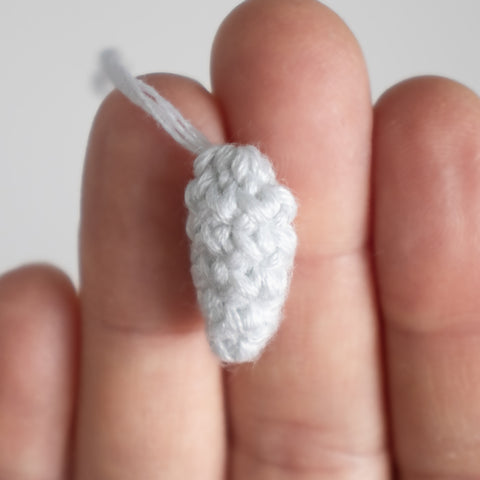
Make a magic loop from white (glow in the dark yarn). Work in continuous spiral rounds.
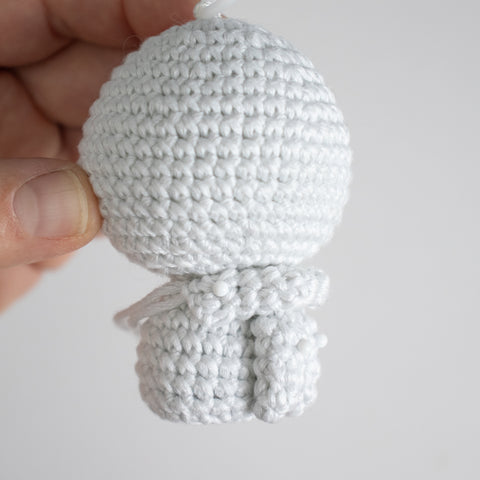
Take a break to install the vibrating box inside the head of the Kodama as shown in the box below. Once the vibrating insert is installed properly, come back here and crochet the following two rnds to finish the body:
17. [dec, sc 1] 8x (16)
Stuff the bottom part of the head very well.
18. [dec] 8x (8)
Don't cut the yarn but continue with the body.
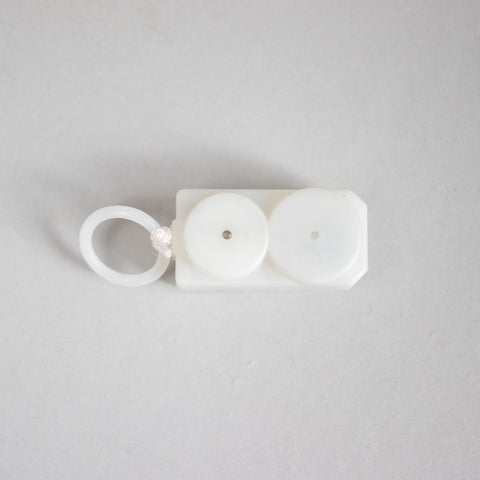
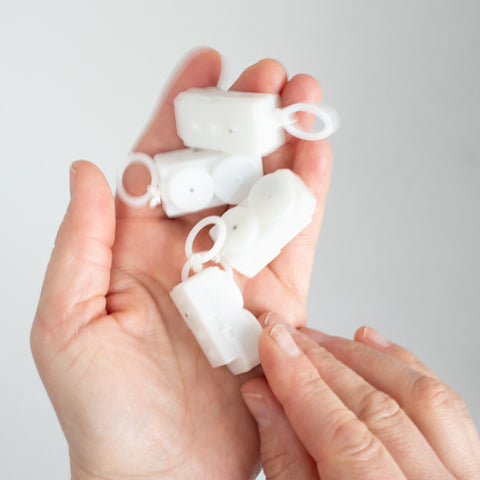
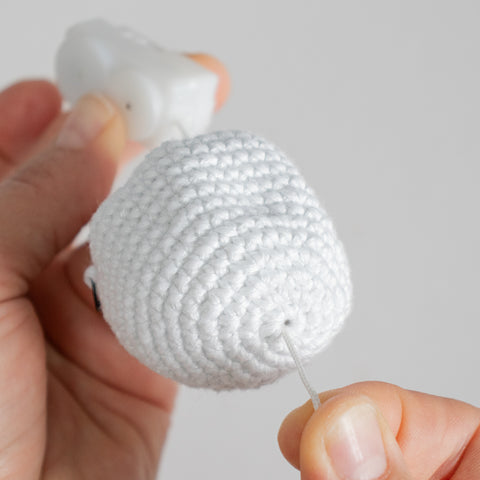
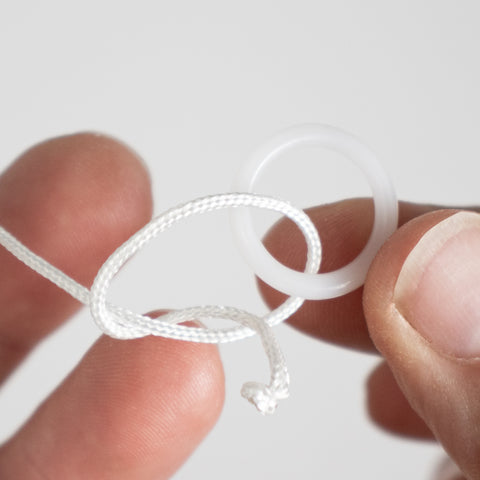
Installing the vibrating box
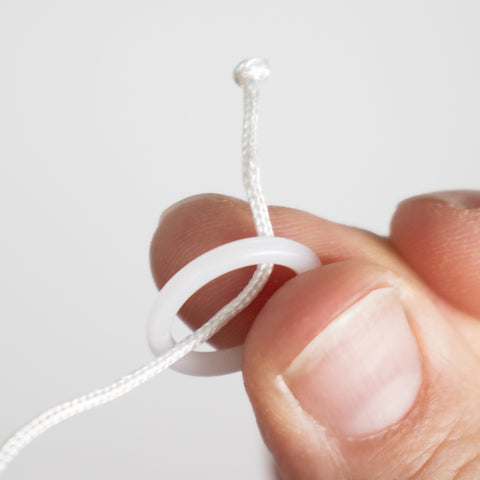
First, untie the ring that comes attached to the box.
Then, pull the end of the pull cord of the box through the center of the magic loop at the tip of the head, from inside to outside.
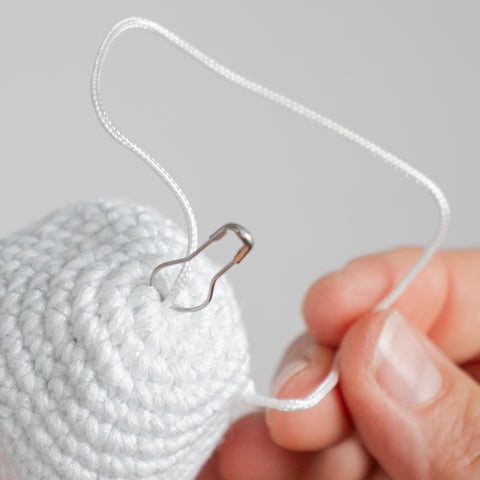
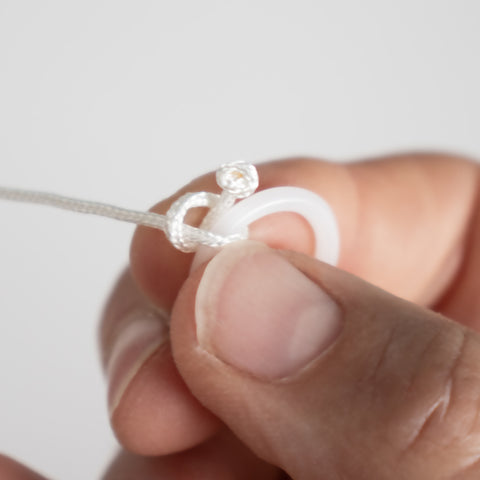
Fasten the cord
Pull the cord out of the box carefully and run a needle or stitch marker through the cord right next to the head to prevent the cord from being pulled back into the box.
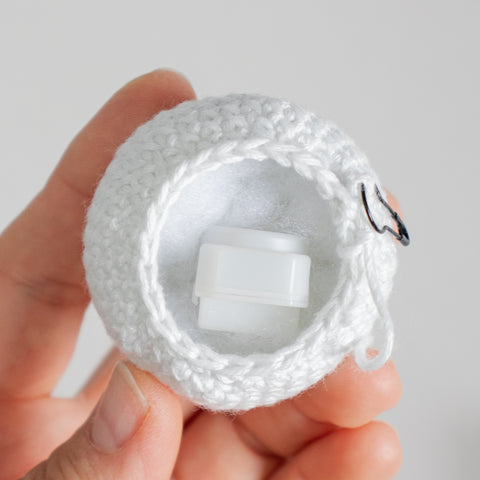
Stuff the head
Now that the box is placed inside the head, stuff the space around the box very well.
Do not stuff above the box where the pull cord is to prevent stuffing being pulled into the box which would make the mechanism stop working.
Take also good care that the hole where the cord runs out of the box is remains directly below center of the magic loop!
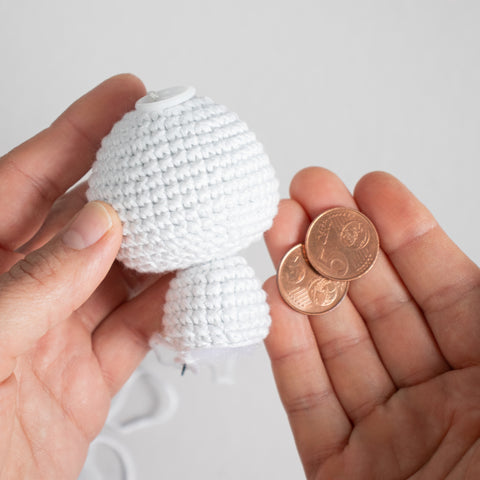
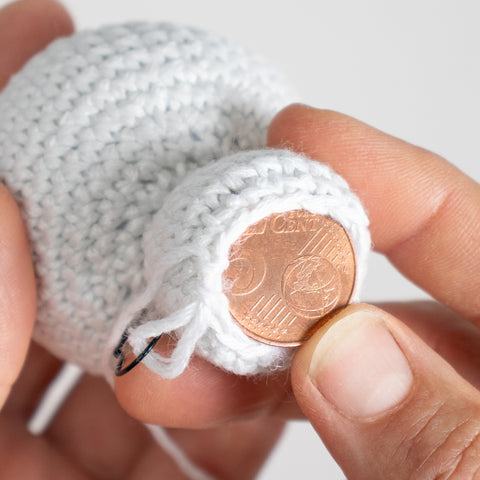
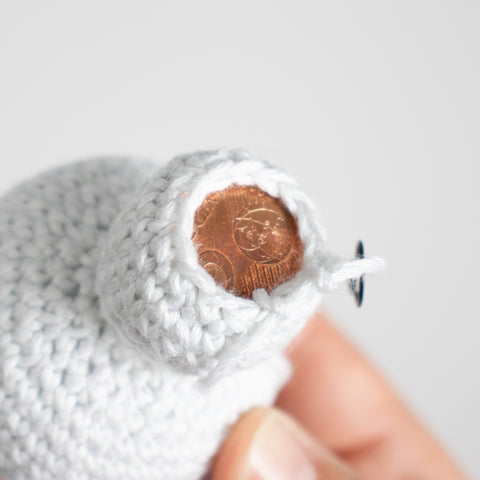
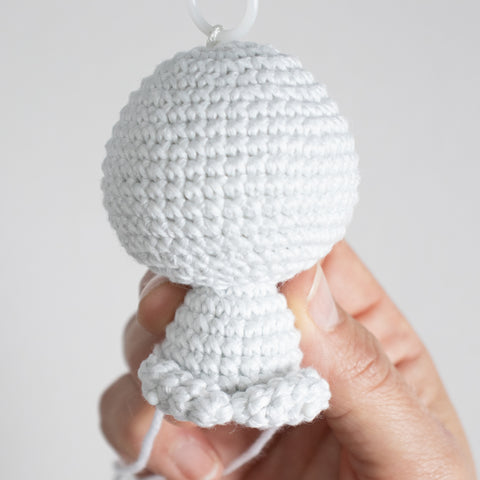
The head of the Kodama with the vibrating box inside is quite heavy, so that it is necessary to create a counterbalance that makes the Kodama sit securely without fall over too easily. To achieve this, insert two 5 Euro cent coins (or other coins of the right size) as a flat layer into the bottom (refer to gallery below).
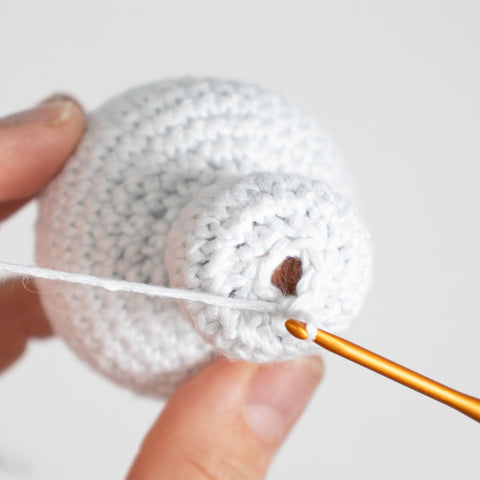
Once the counterballance is installed, come back here and finish the last round to close the body:
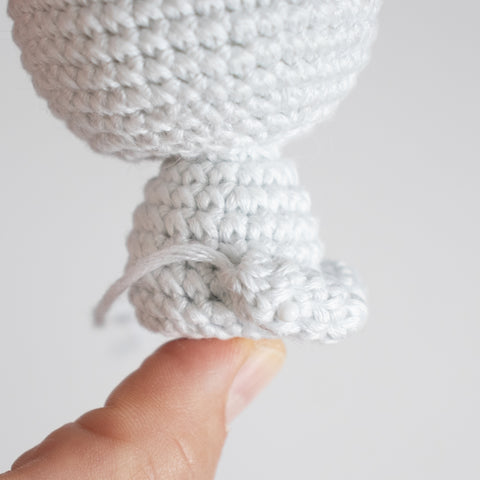
27. [dec] 7x (7)
Cut the yarn and close the remaining stitches through front loops. Weave in ends.
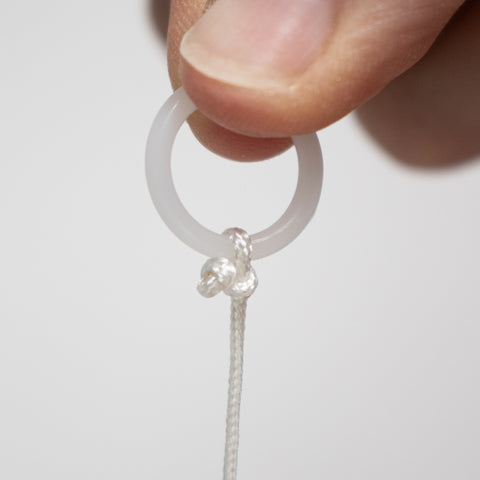
Reattaching the ring to the pull cord
Reattach the ring to the end of the pull cord (refer to gallery above) and remove the stitch marker which is holding back the from the cord.
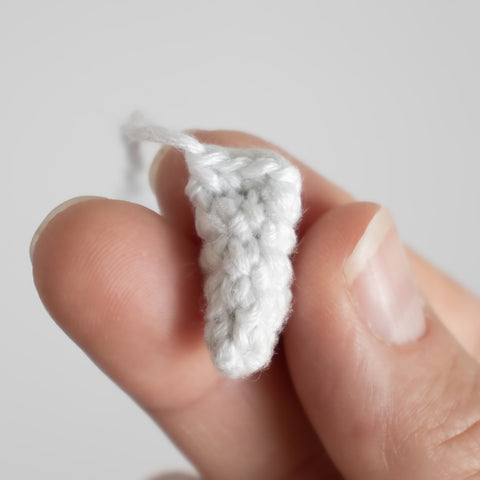
Legs - make 2
No matter whether you want to make a sitting or standing Kodama, the legs are always based on the same shape. The difference is in closing the stitches of the last round.
Basic leg shape:
Make a magic loop from white (glow in the dark yarn). Work in continuous spiral rounds.
01. sc 4 into a ring (4) 02. inc, sc 3 (5) 03. sc 2, inc, sc 2 (6) 04. sc 6 05. inc, sc 5 (7)
Close the last rnd according to two options - sitting, or standing Kodama.
Sitting Kodama:
Cut the yarn with a long rest and pull the end through the last stitch completely. Then, close the remaining stitches at the open end of the legs through front loops.
Use the end to sew both ends of the leg, the knee (last rnd) and the toe tip (first rnds), onto the body so that the legs stay in position properly. Weave in all ends.
Standing Kodama:
Ch 1, fold the open end so that 3 sts line each other in two layers. Insert hook in the pairs of stitches at once to close the open end: sc 3.
Then, cut the yarn with a long rest and pull the end through the last stitch completely. The long yarn end will be used to sew the legs onto the body later.
Arms - make 2
Make a magic loop from white (glow in the dark yarn). Work in continuous spiral rounds.
01. sc 4 into a ring (4) 02. inc, sc 3 (5) 03.-05. (3 rnds) sc 5
Ch 1, fold the open end so that 2 sts line each other in two layers. Insert hook in the pairs of stitches at once to close the open end: sc 2.
Then, cut the yarn with a long rest and pull the end through the last stitch completely. The long yarn end will be used to sew the arms onto the body.
Sewing limbs onto the body
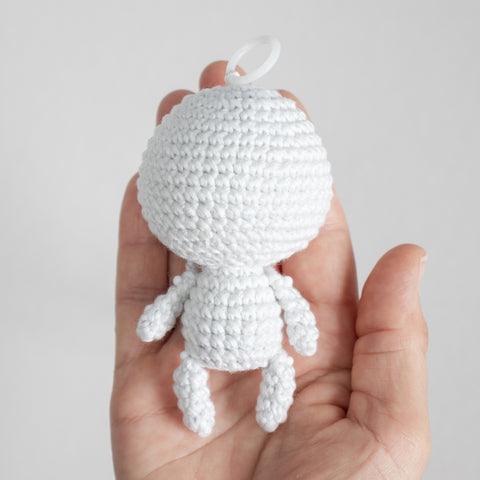
Depending on which Kodama you want to create, arms and legs are sewn to the body in different positions. Start with the legs first and sew the arms once the legs are attached.
Legs
Standing Kodama: Use the long yarn end to sew the legs onto the left and right side of the body, between 3rd and 4th rnd counted bottom up. Weave in all ends.
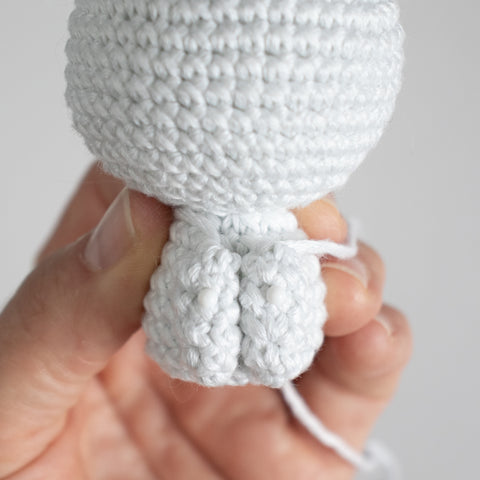
Sitting Kodama - Version 01: Use the yarn ends to sew the legs closely next to each other onto the front of the kodama's body (vertically). Sew through the ends of the leg (knees and tip toes) to keep them in place.
Sitting Kodama - Version 02: Use the yarn ends to sew the legs with their tip toes touching each other at the front of the Kodama's body. Sew through the tips and the end of the legs.
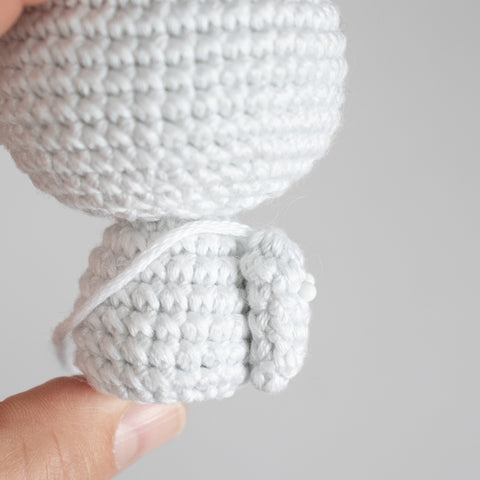
Arms
Sitting Kodama - Version 01: For the arms to be placed resting on the knees, sew the flat end of the arm onto the body vertically – with the upper corner of the flat end of the arm right below the head.
Standing Kodama & Sitting Kodama - Version 02: For the arms to be standing vertically on the sides of the body, sew the flat end of the arms onto the body between rnd 01 and 02 of the body
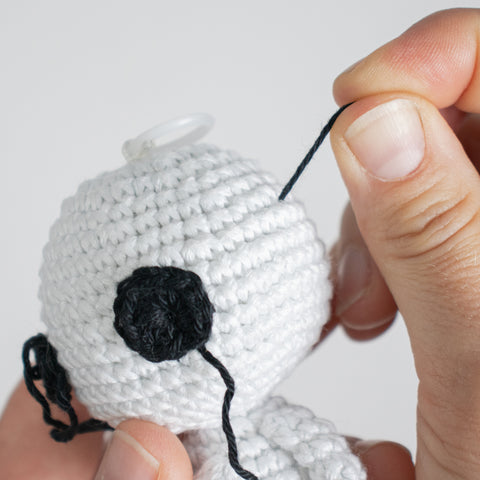
Eyes
Use black yarn to make 2 eyes for your Kodama - one big and one small eye. Work the following stitches into a magic loop:
Small eye: sc 9 into a magic ring, cut the yarn with a long rest close the rnd invisibly.
Big eye: hdc 12 into a ring, cut the yarn with a long rest close the rnd invisibly.
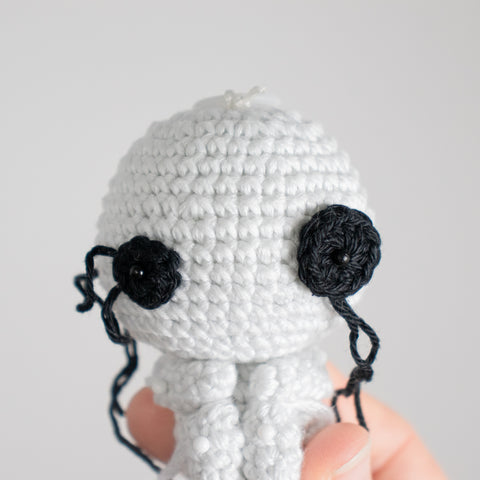
To find the right position for the eyes to be placed on the head mark tweo stitches between rnds 10 and 11 (counted top down) with a distance of 8-9 stitches between both pins. For an extra odd look, go one or more rnds up or down for the second eye.
Now test pin the center of the eyes on top of the marked stitches and check if you like the position of the eyes. Adjust a stitch to the left or right, up or down, if needed.
Decide yourself to attach the small or big eye on the left or on the right. important is that the eyes will be attached with their center to be placed on top of the marked stitches.
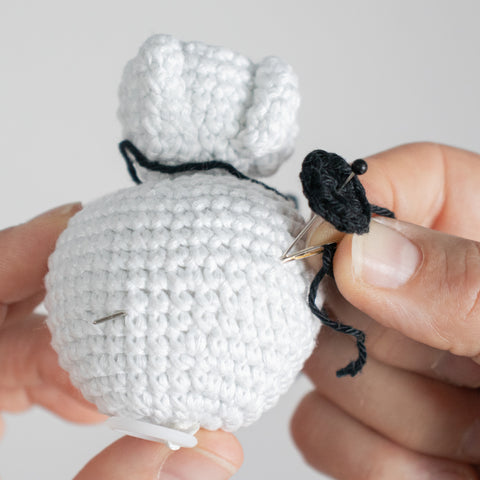
To make sure that the center of the eye keeps in place while sewing the eyes onto the head, thread a needle with the initiating yarn end first (this is the short end at the center of the eye remaining from the magic loop). Insert the needle into the marked stitch, run it though the soft stuffing, coming out through a stitch on the back, or side of the head. Pull the yarn tail. Now, use the long yarn end of the eye to sew the edge of the eye to the head.
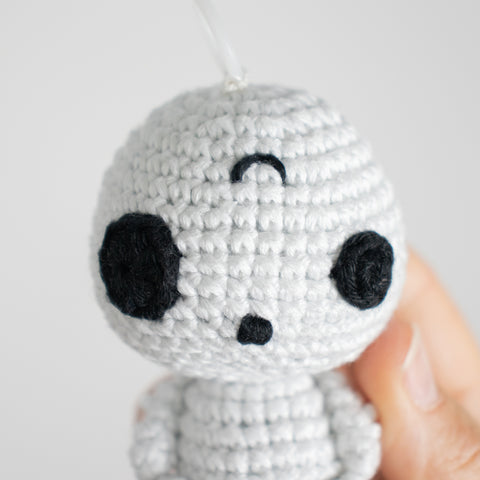
Embroidering Details
Use black yarn to embroider a mouth. Decide yourself weather your Kodama is looking cheeky, stunned, affraid or if it is smiling. Place the mouth a bit offset from the center of the face.
You can add a little tribal detail on the forehead of the Kodama, which makes the little tree spirit look extra cute.
Join our News Club
Sign up for lalylala news, confirm your subsciption, enjoy a 10% Off Welcome Coupon emailed for your next buy.
Cookies
This website uses cookies to ensure you get the best experience on your device.