Infos zu neuen Häkelanleitungen, kostenlosen Mustern, Häkeltipps und Rabattaktionen - dann und wann direkt in dein Postfach.
Free Crochet Pattern
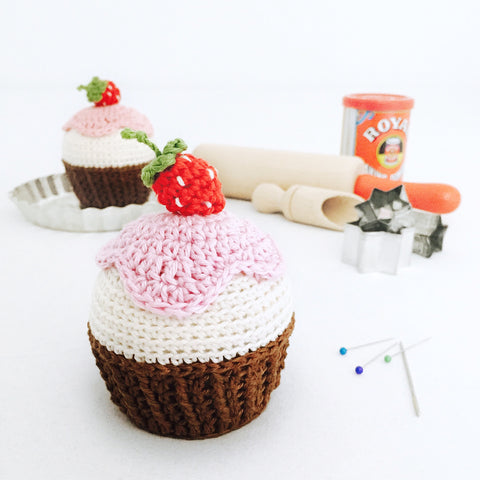
Cupcake Pincushion
Free Crochet Pattern
Cupcake Pincushion
You can use any yarn weight you prefer. Bigger yarn = larger cupcakes ... YUMMY!
depends on the yarn and hook size you choose
ch = chain stitch
dc = double crochet stitch
dc-inc = dc increase (crochet 2 dc in indicated stitch)
dec = decrease (sc together the next 2 stitches)
FPhdc = front post half double crochet stitch (how-to-video)
hdc = half double crochet stitch
hdc-inc = hdc increase - hdc in indicated stitch 2 times
inc = increase (work 2 sc in indicated stitch)
rnd(s) = round(s)
sc = single crochet stitch
sctbl = sc through back loop only
sctfl = sc through front loop only
sk = skip
slst = slip stitch
st(s) = stitch(es)
tr = treble crochet stitch / triple crochet stitch
[...] ...x = repeat instructions in brackets ... times
(...) = number of stitches after this round
Cup
Make a magic loop from brown. Work in a continous spiral.
01. sc 6 into the loop(6)
02. [inc] 6x (12)
03. [sc 1, inc] 6x (18)
04. sc 1, inc, [sc 2, inc] 5x, sc 1 (24)
05. [sc 3, inc] 6x (30)
Following rnds will be closed with a slst! Ch 2 at the beginning of each rnd
count as 1 hdc, slip stitches do not count as a stitch.
06. slst 1, ch 2, hdc 2, hdc-inc, [hdc 4, hdc-inc] 5x, hdc 1, slst 1 into the 2nd beginning-ch to close the rnd (36)
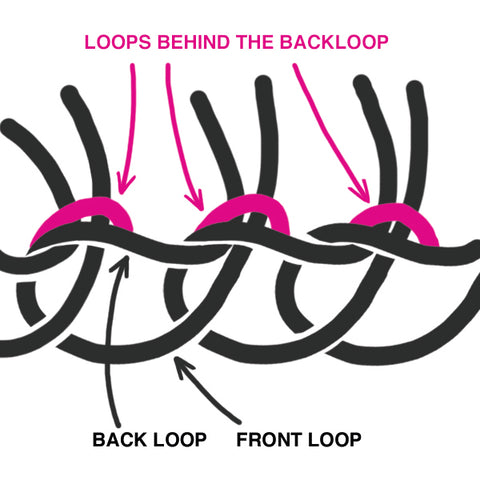
In the next rnd, insert the hook into the back bumps:
07. ch 2, hdc 35, close rnd with a slst into the top of the first hdc (36
The back bump is the loop behind the back loop of a stitch.
08. ch 2, FPhdc around the post of the first hdc, sk 1, hdc into next stitch, [FPhdc around the next post, sk 1, hdc into the next st] 16x, FPhdc, slst 1 into first hdc (36)
09.+10. (2 rnds) repeat rnd 08 (36)
11. ch 2, FPhdc around the post of the first hdc, sk 1, °hdc 2° into next stitch, [FPhdc around the next post, sk 1, °hdc 2° into the next st] 16x, FPhdc, slst 1 into first hdc (53)
12. ch 2, FPhdc around the post of the first hdc, sk 1, hdc 2, [FPhdc around the next post, sk 1, hdc 2] 16x, FPhdc (53)
Cut the yarn, close the rnd invisibly and weave in all ends.
Cake
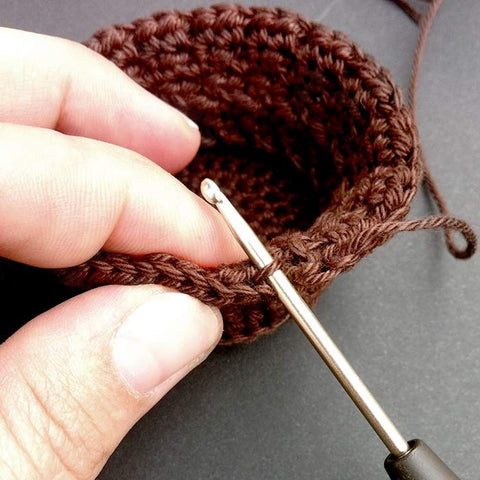
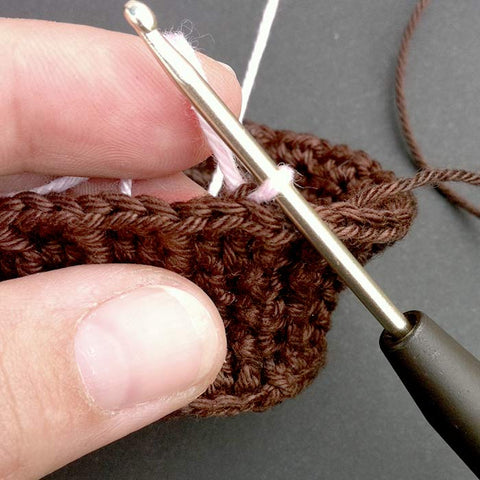
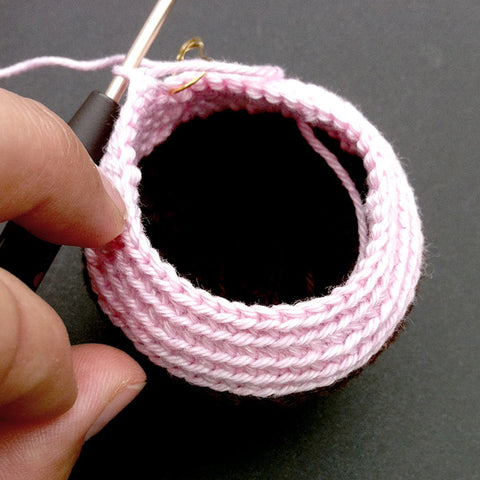
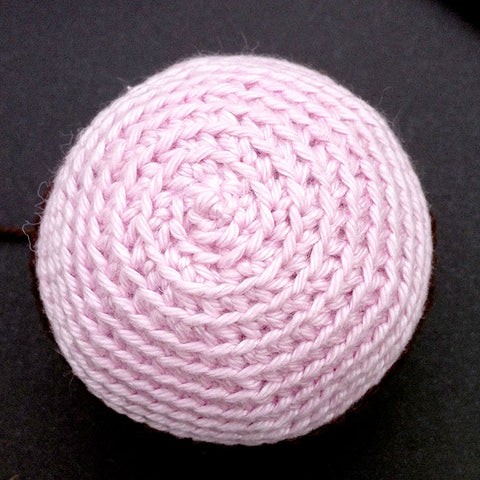
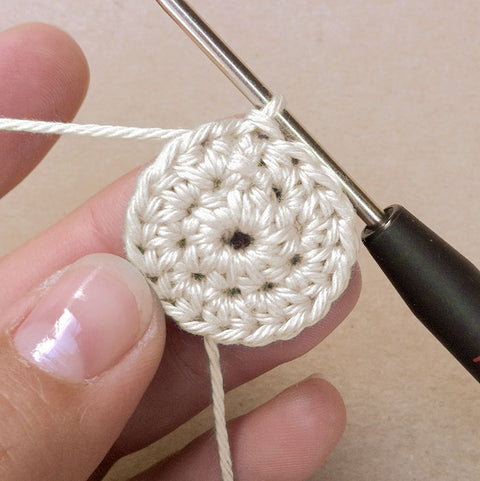
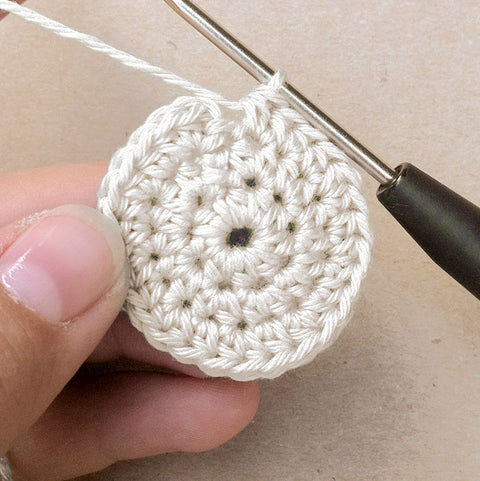
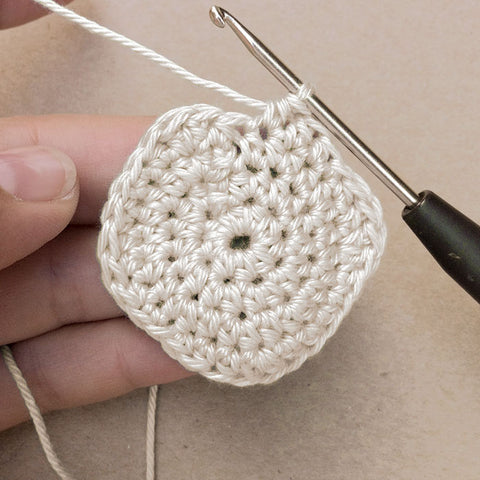
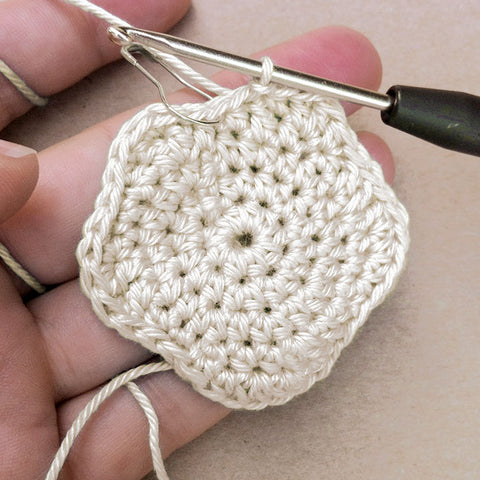
13. On the back side of the sts of the last rnd of the cup, join pink with a slip knot into any back bumb (→ photos 02-04), work into the back bumps: sc 52 (52)
From now on, work into the back loops only (-blo):
14.+15. (2 rnds) sc-blo 52
16. [dec-blo, sc-blo 11] 4x (48)
17. sc-blo 48 (48)
18. sc-blo 3, dec-blo, [sc-blo 6, dec-blo] 5x, sc-blo 3 (42)
19. [dec-blo, sc-blo 5] 6x (36)
20. sc-blo 2, dec-blo, [sc-blo 4, dec-blo] 5x, sc-blo 2 (30)
21. [dec-blo, sc-blo 3] 6x (24)
Stuff the cake well.
22. sc-blo, dec-blo, [sc-blo 2, dec-blo] 5x, sc-blo (18)
23. [dec-blo, sc-blo 1] 6x (12)
24. [dec-blo] 6x (6)
Cut the yarn, close the last rnd and weave in all ends.
Cream
Make a magic loop from white.
01. ch 2 (counts as 1 st), hdc 9 into the loop, tighten the loop, slst 1 into the top of the beginning-ch-2 (2nd ch counted bottom-up) to close the rnd (9)
02. ch 2 (counts as 1 st), [hdc-inc] 9x, slst 1 into the top of the beginning-ch-2 to close the rnd (18)
03. ch 2, [hdc-inc, hdc 1] 9x (27)
Do NOT close the rnd with a slst this time! Instead go ahead working in a continous spiral:
04. hdc 1 into the top of the first hdc, dc-inc, hdc 1, sc 2, hdc 1, dc 2, hdc 1, sc 1, slst 1, sc 1, hdc 2, dc-inc, dc 1, hdc 2, sc 1, hdc 1, dc-inc, dc 1, hdc 1, slst 1, hdc 1, dc 1, hdc 1 (30)
05. slst 2, hdc-inc, sc 1, slst 2, sc 1, hdc 1, hdc-inc, slst 3, hdc 2, dc-inc 2, hdc 1, slst 2, sc 2, hdc-inc 2, slst 3, hdc 1, dc-inc, hdc 1, slst 1 (37)
06. slst 1, sc 1, hdc 1, hdc-inc, slst 3, sc 2, hdc 1, hdc-inc, hdc 1, sc 1, slst 3, sc 1, hdc 1, dc-inc 2, hdc 1, sc 1, slst 2, sc 2, hdc-inc, hdc 1, sc 1, slst 3, hdc 1, hdc-inc, hdc 1, sc 1, slst 1 (43)
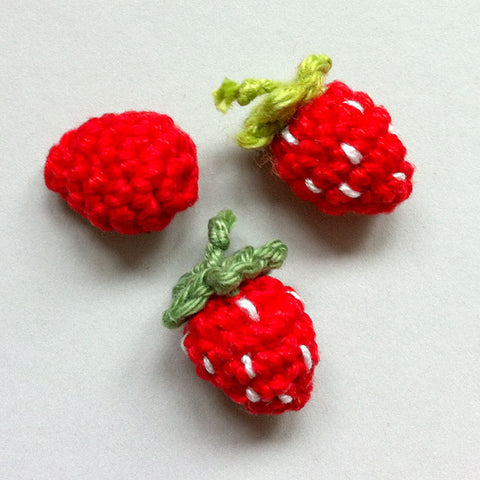
Strawberry
Make a magic loop from red.
01. sc 6 into the loop, tighten the loop (6)
02. [inc] 6x (12)
03.+04. (2 rnds) sc 12 (12)
05. [sc 2, dec] 3x (9)
Stuff the strawberry.
06. [dec] 3x (6)
Cut the yarn, close the last rnd and weave in the ends.
Leaves
Make a magic loop from green.
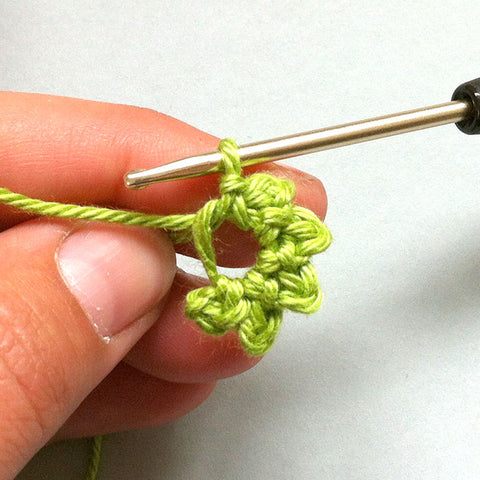
01. [ch 2, sc 1 in the 2nd chain from hook, slst 1 into the loop] 5x, tighten the yarn loop, close rnd with slst 1 into the very first st.
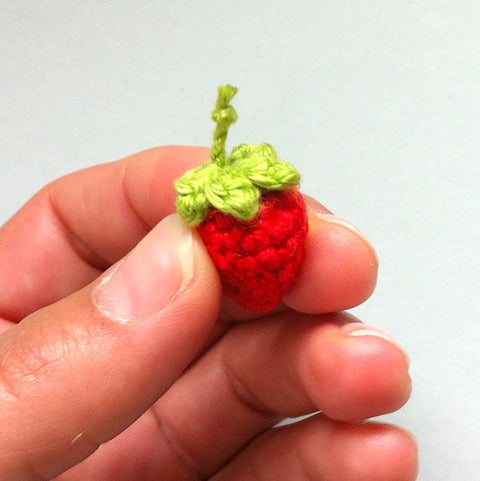
Cut the yarn and pull the yarn tails through the center of the rosette. Twist both threads together to form a little stem. Fix the twisted yarn with a knot.
Sew the leaves onto the top of the strawberry. Finally, embroider little white seeds onto the strawberry.
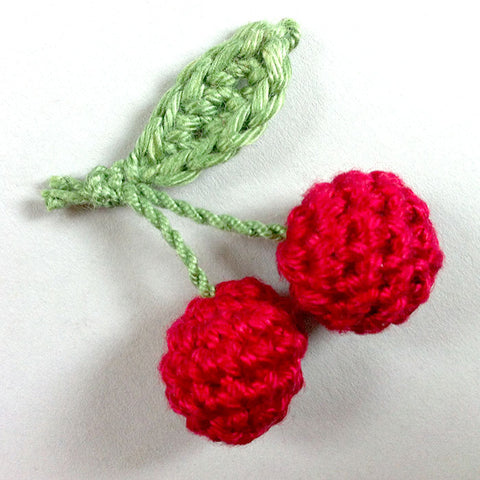
Cherry
Make a magic loop from red.
01. sc 6 into the loop, tighten the loop (6)
02. [inc] 6x (12)
03.+04. (2 rnds) sc 12 (12)
05. [dec] 6x (6)
Stuff the cherry, close the last rnd through the front loops and weave in all ends.
Leaf & Stem
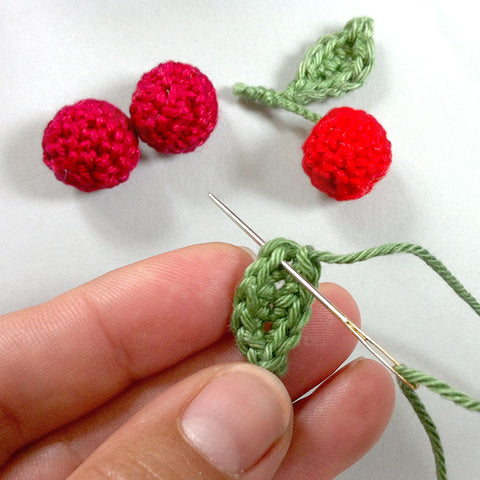
With green make a foundation chain of 6 ch. Starting in the 2nd ch from hook, work along the chain:
slst 1, sc 1, hdc 1, sc 1, slst 1, ch 1, along the other side of the chain: slst 1, sc 1, hdc 1, sc 1, slst 1
Cut the yarn with a long rest and close the round invisibly.
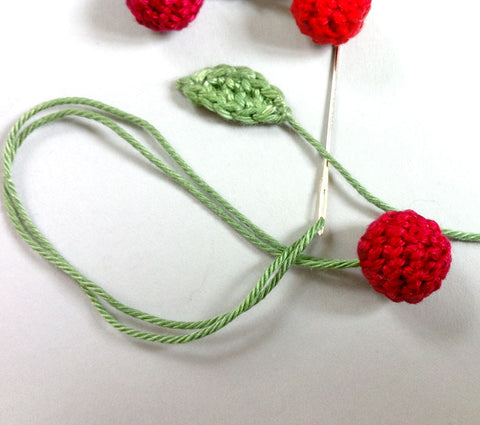
Take the green yarn double and pull it through the cherry. Twist both threads to a cord. Make sure you have a long cord, as you'll need it to knot two cherries together.
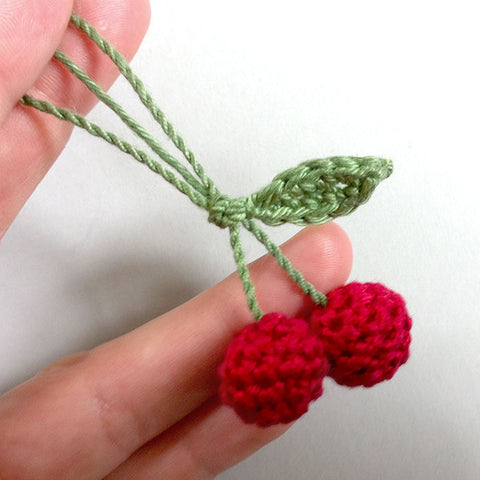
Once you've made a second cherry following the same instructions, hold together the cords of the two cherries and the yarn tail remaining on the leaf and tie them together with a knot (place the knot closely above the leaf).
Assembling
Sew the cream onto the top of the cake. Then, sew the topping (strawberry or cherry) onto the cream. Enjoy your cupcake!
© 2022 Lalylala Crochet. Lydia Tresselt
All rights reserved! No part of this pattern may be published, resold, reproduced (in any form or by any means, electronic or mechanical, by photocopying, recording or otherwise), shared, translated or altered without prior permission in writing from the author.
The design and pattern are copyright and must not be reproduced for resale! You cannot sell finished toys made from this pattern. For your personal use (non-profit) or for charity purposes you are permitted to make as many items from this pattern as you like.